How I started my blog
Many times I thought that I should start writing a blog. Nothing fancy, just about what techy problems I face and if and how I solved them. I just never started. Whether I was too lazy to set the thing up or didn’t think the topic was meaningful enough (good one, look at this post), there was always a reason not to do it. What do we say to the god of blogs? Yeah, you know what I mean.
But then sometimes all I need is a little push from somebody. In this case I watched the youtube video ‘Hack your career’ by Troy Hunt which was really fun to watch. If you haven’t seen it, you should go watch it. But for me, after watching it, there was this feeling again:

Considerations
Before actually starting, a few questsions wanted answers. What do I want to write about and who would the target audience be? Well, as I said, I don’t plan to become the world’s most famous blogger or anything. So as I see it the target audience consists of mainly two groups:
- Me
- People who googled something and coincidentally landed on this blog.
I guess the first group will be the bigger one and so the main target audience am I. Damn, nothing to brag about, right? Well it’s fine. I will benefit from the writing itself. Maybe I can re-read or look-up something I described here and benefit from it again. You might ask: “Why don’t you just write it in your diary then?” And you are right, I could. But who knows, maybe my writing skills will increase over time and the topics will be more interesting - then somebody else might want to read it, too. You are reading this after all. And if nobody else is interested, so be it.
Essentially I just repeated the advice from Troy and every other blogger that ever wanted to convince someone to start a blog, let’s move on.
So where do we stand now? Mindset? Check! Target audience? Check! Topic to write the first blog post about? Nope, no idea. But hey, I want to write a blog post, I don’t have a blog: behold the glorious first ever blog post topic: How I started my blog! Pretty slick, huh?
The biggest obstacle up to now was always to get a blog of some kind up and running. Because of that I have a few requirements on my blog environment:
-
It must be simple. I don’t want to waste my energy by investing billions (or more) of hours in learning how to use a blog. I want the first steps to be a quick success so I can motivate myself to keep updating and writing.
-
There should be little to no maintenance required. I’ve installed WordPress before on my webspace that comes with my domain. I didn’t get to the point to actually write something because I got so involved in what plugins and themes and other stuff I should use that the most important part got lost. Also I don’t want to care about a database, backups, updates, php versions and all the stuff that comes with dynamic websites and blog engines.
-
I’m from southern germany, upper swabia to be precise, and it’s a commonly used prejustice by my fellow countrymen that we are stingy. And as much as I disagree with that usually, in this case I have to admit that I do not want to spend money in addition to that what I’m paying for the my domain and webspace already. At least not as long as there are millions of thrilled groupie blog readers.
Jekyll
Long story short, I remembered that I’ve somewhere heard about jekyll. Jekyll is a static site generator. You can write markdown files and it transforms it into a website or blog with static html pages. No database required. I didn’t even search for another one, I just started with that one. Why? Fulfills all the above mentioned requirements. Plus I wanted to try it anyway. Double Plus, you can use a github repository to host it and get it online via github pages with no effort at all. That means the whole maintenance thingy is gone. I won’t have to make a backup - I have the code hosted on github and one version checked out on my machine - that’s good enough for me. Github is taking care of the whole hosting stuff. And it’s completely free - as long as it is a public repository.
Hmm a public repository? Doesn’t that mean that all my secret blog stuff is going to be visible to all of you? Yes it does, but it does not matter. Why? Because it’s only static pages. No database user and password in any config files. No secret api-keys. No nothing. You can of course view the repository (and send a pull request to fix typos), but isn’t it more comfortable to view it nicely prepared on a regular blog-looking site?
There is one thing. Github does not allow to use plugins for jekyll on github pages - at least not if github is taking care of doing the site generation. This means I either have to generate the site myself and push the result to github or I can’t use plugins. If I find myself caring about that enough in the future I may switch the site to my own webspace. Until then I’m going to use the github pages.
Hmm .. after each paragraph I think I should start showing what I did to get this blog running, but every time there is something else I want to mention first. Enough with that now! What I did was the following.
Getting started
In order to use jekyll you first need to install Ruby and RubyGems. That’s easy enough on a linux system and is described in detail on the jekyll installation guide. Also then downloading and initializing the jekyll system is very easy and done via the command
gem install jekyll bundler
jekyll new papauorg-blog
where papauorg-blog is the name of the folder that gets created and the jekyll files get placed in. I created a new git repository in that same folder so I can experiment and try things without breaking anything along the way.
git init
git add .
git commit -m "Create empty jekyll template"
The jekyll bundler already added a .gitignore file that excludes the folder for the generated page as well as other cache and metadata directories.
Favicons
Next step which is of course one of the most important ones I can think of for the blog: I need to provide an awesome favicon. For this I went to the RealFaviconGenerator and generated a set of icons. Extracted the files in the root of the jekyll and made sure that the provided link and meta tags are included in the head of the page. For this I created the head.html file in the _includes folder and added the favicon link and meta tags. What this does is overwrite the head part of the theme you are using. In my case it was the minima theme. If you want the site to look like the theme even after you insert your links, you have to take care that the themes contents are also part of the newly created head.html page. To find out what has to be included find the head.html in the themes gem folder and put that content to your own head.html. To find the themes gem folder you can execute:
#minima is the theme name
bundle show minima
# Returns the path --> /var/lib/gems/2.3.0/gems/minima-2.1.1
# look in the _includes folder
Afterwards my head.html file looked like this:
<head>
  <meta charset="utf-8">
  <meta http-equiv="X-UA-Compatible" content="IE=edge">
  <meta name="viewport" content="width=device-width, initial-scale=1">

  <title>{% if page.title %}{{ page.title | escape }}{% else %}{{ site.title | escape }}{% endif %}</title>
  <meta name="description" content="{{ page.excerpt | default: site.description | strip_html | normalize_whitespace | truncate: 160 | escape }}">

  <link rel="stylesheet" href="{{ "/assets/main.css" | relative_url }}">
  <link rel="canonical" href="{{ page.url | replace:'index.html','' | absolute_url }}">
  <link rel="alternate" type="application/rss+xml" title="{{ site.title | escape }}" href="{{ "/feed.xml" | relative_url }}">

  {% if jekyll.environment == 'production' and site.google_analytics %}
  {% include google-analytics.html %}
  {% endif %}

  <!-- favicons -->
  <link rel="apple-touch-icon" sizes="180x180" href="/images/favicons/apple-touch-icon.png">
  <link rel="icon" type="image/png" sizes="32x32" href="/images/favicons/favicon-32x32.png">
  <link rel="icon" type="image/png" sizes="16x16" href="/images/favicons/favicon-16x16.png">
  <link rel="manifest" href="/images/favicons/manifest.json">
  <link rel="mask-icon" href="/images/favicons/safari-pinned-tab.svg" color="#5bbad5">
  <link rel="shortcut icon" href="/images/favicons/favicon.ico">
  <meta name="msapplication-config" content="/images/favicons/browserconfig.xml">
  <meta name="theme-color" content="#ffffff">
</head>
As you can see I chose to put the favicons and config files of the generator under a sub directory images/favicons to keep the root level tidy. Jekyll copies files and folders that do not have a specified meaning for jekyll to the generated site so the favicons will be available there. Now commit that change and if I want to bookmark my own blog on different devices I get beautiful favicons now. Time for a first check. Execute
jekyll serve
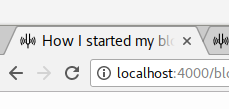 and visit http://localhost:4000 and view your empty blog with awesome favicon.
Some love for search engines
For the second target audience, the random googlers, to find this page, a little more information on the page is helpful. I don’t really know much about search engine optimization but if I can boost the ranking by nothing more than installing a plugin then I’ll give it a try. The plugin is called jekyll-seo-tag and it’s also supported on github pages. The installation is simple and it adds a few tags to the pages that are used by search engines.
Add the plugin to the _config.yml, install it via gem install jekyll-seo-tag and add it to the Gemfile as described in the docs.
After that fill the information in the _config.yml and include a {% seo %} in your custom _includes/head.html file for the tags to be included in your pages. After doing that some tags like <title> were in the pages twice. I removed these from my head.html file and used the ones coming from the plugin instead.
Github pages
As described earlier I will use github pages for hosting this blog. At least until I feel the need to move somewhere else. To get started, the first step is to go to github and create a new repository named yourgithubusername.github.io so in my case: papauorg.github.io. 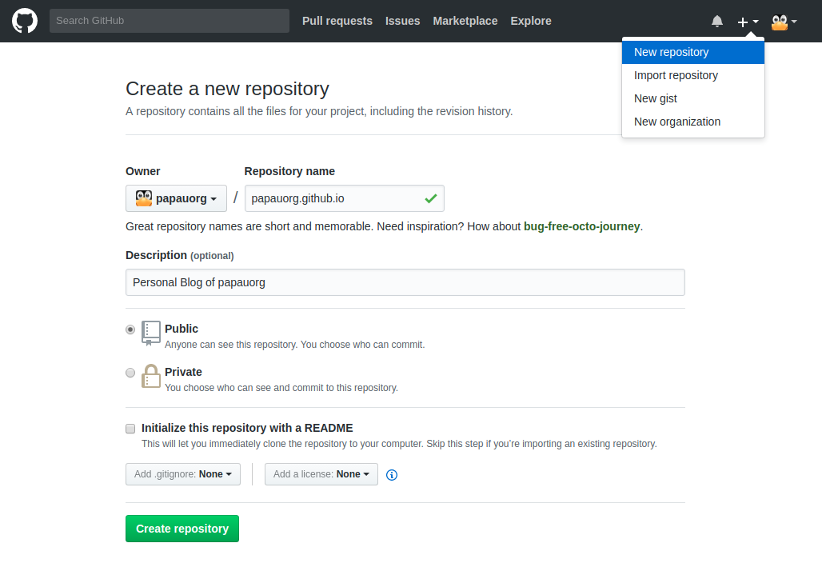
Awesome. Now follow the instructions in the overview to add the remote to your local git repository and push it up to github.
git remote add origin [email protected]:youruser/youruser.github.io.git
git push -u origin master
That’s it! Now my very first blog is hosted under https://papauorg.github.io. If you see an 404 error on your github page, then maybe you need more patience. The first page build can take a while. If it’s still not there after a few minutes, take a look at the troubleshooting guide. In my case I requested my page before pushing first and the 404 page was cached. Disabling the browser cache didn’t help, because it was cached by a cache server of github. A little trick helped me to view the page the first time, I just called https://papauorg.github.io?some=queryparam to trick the cache server to load the page from the built source and making sure the page works. Later I pushed a new commit to the page and found out that this solved the caching problem and I could use the regular URL.
Github pages are available over a secure connection (https) which is pretty cool and all, but I really want to use my own domain for my blog. Custom domains are supported by github, but as far as I can tell it’s not possible to have a secure connection with custom domains. That is slightly annoying but nothing we couldn’t fix.
Cloudflare
Cloudflare to the rescue! Cloudflare is a service, that can be placed before your website. It can handle the SSL/TLS certificates for your domains, provides DDOS protection and other useful tools that I’m not going to describe here. I just want my domain + TLS for my blog. For this I did the following steps:
- Create a new Cloudflare account
- Let Cloudflare scan your domain and overtake the DNS records. It guides you through this process when you first login.
- Change the DNS Server that should be responsible for your domain to the ones Cloudflare suggests. In my case I had to login to my current provider and change the nameservers via the web administration interface.
- Create a CNAME DNS record e.g.
blog.papau.orgthat points topapauorg.github.ioin the cloudflare DNS settings - Add a custom domain for your github page by clicking the
Settingsbutton while in theyouruser/youruser.github.iorepository. - If not already the case activate the
Always use HTTPSsetting in cloudflare.
I had to wait a few minutes for the changes to take effect, but then I got this amazing view: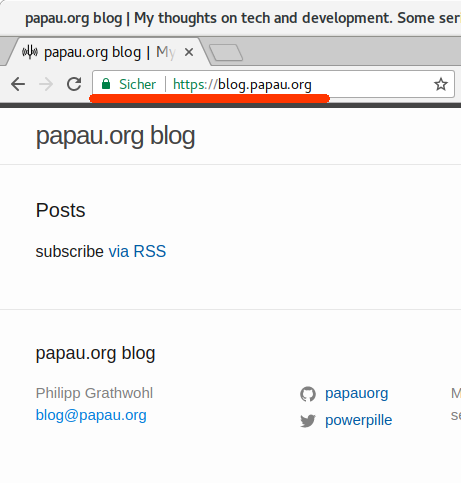
Content
So now there is only one thing left to do. Add some content. And nothing is simpler than that, just copy all of this blog post, format it in markdown and create a new 2017-10-10-how-i-started-my-blog.md in the _posts folder in jekyll. Commit, push and visit the page. PROFIT!
Conclusion
I finally started my blog with markdown, jekyll and the tool developers know and love - git. It took me a while to write this post and get it online, but I’m sure it can be done faster. But I really love to take long breaks - a lot of them. :) I’m glad that the first step is done and hope I keep updating this thing. Well, we’ll see …